
Skip to navigation

Embed tax registration intake forms on your site

The Middesk JavaScript SDK lets you embed the tax registration intake flow directly in your application. Your users complete state and local tax registrations without leaving your site, while Middesk handles the form logic, jurisdiction requirements, and submission.
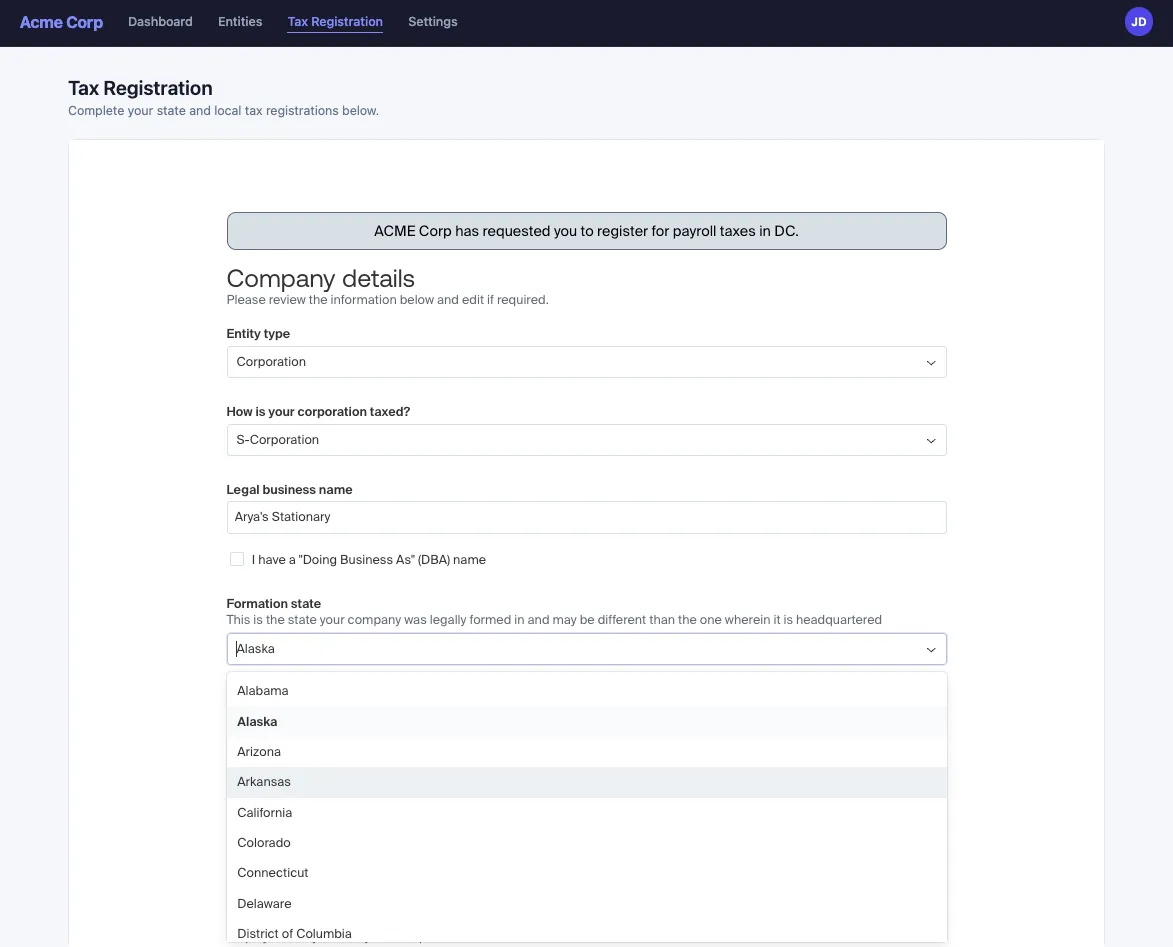
Embedded tax registration intake experience

Before you begin

Make sure you have the following:

  • A Middesk account with entity management enabled
  • A publishable API key (prefixed pk_) — used in your frontend to initialize the SDK
  • A secret API key (prefixed mk_) — used on your server to request passcodes
  • Your domain registered as an allowed domain
  • A passcode for the entity

Your publishable key is safe to include in client-side code. Your secret key must only be used from your server and should never be exposed in frontend code or shared with end users.

Configure allowed domains

Register your application’s domain as an allowed domain before loading the SDK. Requests from unregistered domains are rejected.

To add an allowed domain, go to Developer > SDK Settings in the Middesk dashboard.
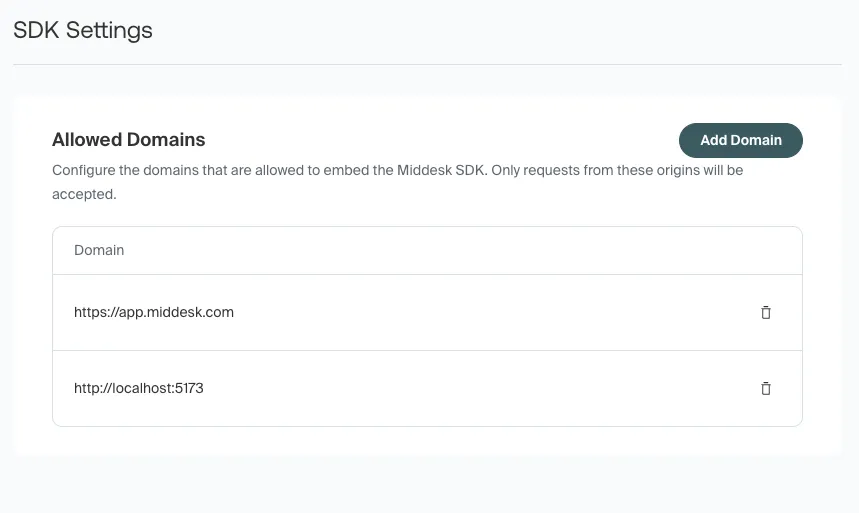
SDK Settings page showing allowed domains configuration

Get a passcode

The SDK requires a passcode to authenticate the session for a specific company. Retrieve one from your backend using the GET /v1/partner/passcode endpoint, authenticated with your secret API key.

The endpoint accepts either a company_id or an external_id query parameter to identify the company:

curl https://api.middesk.com/v1/partner/passcode?company_id=COMPANY_ID \
-H 'Authorization: Bearer mk_live_YOUR_API_KEY'

The response includes a passcode field — pass this value as the passcode prop when creating the SDK component:

{
"id": "passcode_id",
"passcode": "PASSCODE",
"expires_at": "2026-03-01T00:00:00.000Z",
"url": "https://..."
}

You cannot provide both company_id and external_id in the same request. If no active passcode exists for the company, one is created automatically.

Install the SDK

Add the Middesk SDK script to your page:

<script src="https://js.middesk.com/embed-sdk/v1/middesk.js"></script>

Set up the component

1

Create a Middesk instance

Initialize the SDK with your publishable key:

const middesk = new Middesk({ publishableKey: "pk_live_YOUR_PUBLISHABLE_KEY" });
2

Create the tax registration intake component

Call createComponent with the component name, the passcode for the entity, and an event handler:

const component = await middesk.createComponent({
name: "tax-registration-intake",
props: {
passcode: "PASSCODE",
highlighted_state: "NY"
},
onEvent: (event) => {
console.log("SDK event:", event);
}
});
3

Mount and display the component

Attach the component to a container element in your page, then make it visible:

const container = document.getElementById("middesk-container");
component.mount(container);
component.open();

The container element should have explicit dimensions. The component fills the width and height of its container:

<div id="middesk-container" style="width: 750px; height: 600px;"></div>

Full example

<div id="middesk-container" style="width: 750px; height: 600px;"></div>
<script src="https://js.middesk.com/embed-sdk/v1/middesk.js"></script>
<script>
async function initMiddesk() {
const middesk = new Middesk({
publishableKey: "pk_live_YOUR_PUBLISHABLE_KEY"
});
const component = await middesk.createComponent({
name: "tax-registration-intake",
props: {
passcode: "PASSCODE",
highlighted_state: "NY"
},
onEvent: (event) => {
console.log("SDK event:", event);
}
});
const container = document.getElementById("middesk-container");
component.mount(container);
component.open();
}
initMiddesk();
</script>

Component props

Pass props to the intake component through the props object in createComponent.

PropTypeRequiredDescription
passcodestringYesThe passcode that authenticates the session for the entity. See Get a passcode.
highlighted_statestringNoA two-letter US state code (for example, NY). Pre-selects that state’s tile on the first screen and moves it to the top of the list.

When you set highlighted_state, the component selects and reorders the matching open registration request. If the state has no open request — because the code is unrecognized or that registration has already been submitted — the component falls back to selecting the first open request and leaves the list in its original order.

Handle events

The onEvent callback receives events from the component as the user interacts with the intake flow. Each event has the following shape:

FieldTypeDescription
typestringThe event type. One of READY, DONE, or ERROR.
componentNamestringThe name of the component that emitted the event (tax-registration-intake).
payloadobjectAdditional data associated with the event. Present on ERROR events.

READY

Emitted when the component has loaded and is ready for user interaction. No payload.

{
"type": "READY",
"componentName": "tax-registration-intake"
}

DONE

Emitted when the user has completed all outstanding tax registration requests. No payload.

{
"type": "DONE",
"componentName": "tax-registration-intake"
}

ERROR

Emitted when the component encounters an error. The payload includes an error object with a code and message.

{
"type": "ERROR",
"componentName": "tax-registration-intake",
"payload": {
"error": {
"code": "LOAD_ERROR",
"message": "Missing required props: passcode"
}
}
}
Error codeDescription
LOAD_ERRORThe component failed to load.
UNAUTHORIZEDThe passcode is invalid or expired. Request a new one from the passcode endpoint.
NOT_FOUNDThe requested resource was not found.
INTERNAL_ERRORAn unexpected error occurred within the component.

Example

onEvent: (event) => {
switch (event.type) {
case "READY":
console.log("Component is ready");
break;
case "DONE":
console.log("User completed all registrations");
break;
case "ERROR":
console.error(event.payload.error.code, event.payload.error.message);
break;
}
}

Component lifecycle methods

The object returned by createComponent exposes the following methods:

MethodDescription
mount(container)Attaches the component to a DOM element. Call this once after creating the component.
open()Makes the component visible.
close()Hides the component without removing it. Call open() to show it again.
destroy()Removes the component from the DOM and cleans up resources. After calling this, the component cannot be reused.

Test in sandbox

Use the Middesk sandbox environment to test the embedded tax registration intake flow before going live.

Make sure to add the host you use for sandbox testing (for example, localhost) to your allowed domains. Requests from unregistered domains are rejected even in sandbox.

1

Create sandbox API keys

Generate a sandbox publishable key (pk_test_) and a sandbox secret key (mk_test_) from Developer in the Middesk dashboard.

2

Create test registration requests and company

Use the sandbox API to create companies and tax registration requests. See Manage Business Entities > Sandbox Guide for details on creating test data.

3

Request a sandbox passcode

Call the sandbox passcode endpoint with your sandbox secret key:

curl https://api-sandbox.middesk.com/v1/partner/passcode?company_id=COMPANY_ID \
-H 'Authorization: Bearer mk_test_YOUR_SECRET_KEY'
4

Initialize the SDK with sandbox credentials

Use your sandbox publishable key and the passcode from the previous step:

const middesk = new Middesk({
publishableKey: "pk_test_YOUR_PUBLISHABLE_KEY"
});
const component = await middesk.createComponent({
name: "tax-registration-intake",
props: {
passcode: "SANDBOX_PASSCODE",
highlighted_state: "NY"
},
onEvent: (event) => {
console.log("SDK event:", event);
}
});
Get a demo
Contact your account manager or contact sales to inquire about access.